|
How to fully de-restrict a 1993-2001 Honda NSR125R
UK spec
Before carrying out the work make
sure you are confident you know what you are doing... If
you have any questions feel free to ask them on our discussion
forum. We've de-restricted 3 bikes this
way from stock-out-of-the-shop to 100Mph missiles, if these procedures do not
see your bike hitting at least
90Mph you should see a mechanic about possible problems or non-standard
restrictions in place.
Getting Started
1) Firstly, try to determine how
your bike is restricted... This can save you a lot of time, compare your
bike to the table below for the most likely restrictor combination.
| Top speed of around 75mph?
0-60 about 11 seconds? |
Most likely a stock bike,
restrictors in the exhaust, intake housing, and a smaller front
sprocket. |
| Top speed of around 100mph?
0-60 about 5 seconds? |
Most likely a de-restricted
bike, apart from the front sprocket |
| Top speed of around 110Mph?
0-60 about 6 seconds? |
Most likely a de-restricted
bike, including a proper size front sprocket. |
Right, you should have a fairly
good idea of the restrictors in place on your bike. If not then don't worry - it
doesn't hurt to explore... As long as you are fairly good with your hands and
have the right tools you should
have no problem doing the work.
The Exhaust Restrictor:
1) Remove the lower fairings from both sides of the bike with a crosshead
screwdriver.
2) Undo the exhaust bolts holding the exhaust to the rear pillion peg
mount and the middle mount found behind the rear brake
lever. Take the nuts off the bolds but leave the bolts in place for now. You
need a 12mm socket for this.
3) Undo the two nuts holding the exhaust manifold to the head with a 12mm
socket and take them off.
4) Taking care to support the exhaust remove the two bolts you loosened
earlier and pull the whole system off the bike.
5) Now check for the restrictor. If the exhaust is unrestricted it will
be wide enough to fit an egg into and smooth. If the restrictor
is in place then the exhaust will be much narrower and will appear to have very
thick walls, there will be 3 blobs of weld holding
the restrictor to the inside wall of the exhaust - depending on how old your
bike is you may need to clean the exhaust deposits
off before you can see these welds.
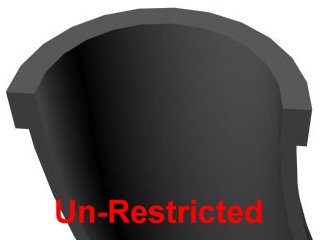 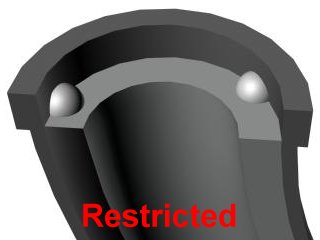
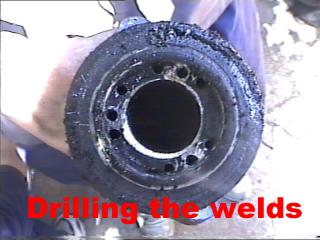 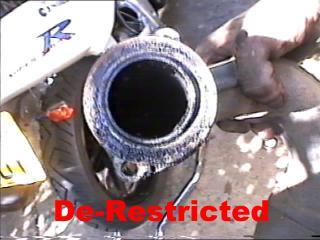
6) If the exhaust is restricted you will need to drill the welds and pull
it out. If not attach it back to the bike reversing the steps
you followed to take it off.
7) To drill the welds, use a small drill bit at first, 5mm to start
with... Drill a hole either side of each weld, vertically down into the
restrictor. The restrictor is not actually solid so you will feel the drill go
through the plate, about 6mm deep... If you have gotten
deeper than 10mm and not punched through the restrictor yet stop and check the
line of your hole, you may be drilling into the
exhaust itself. Feel free to bugger up the actual restrictor as much as you wish
though, you are taking it out and throwing it away
so it doesn't matter if you damage it.
8) Now that you have 2 holes either side of each weld drill another hole
through the middle of each weld, again making sure you
come through the other side of the plate. Remember to drill vertically down to
avoid damaging the actual exhaust.
9) Now get another drill bit, about 8mm, and use that to enlarge each one
of your holes.
10) Repeat using larger and larger bits until you have drilled out most
of the metal making up each weld.
11) Use a pair of long nosed pliers to pull out the remainder of each
weld, then you should notice that the restrictor is in fact
a smaller pipe held in place by two spacers, the one which you just drilled the
welds off of and another one about an inch more
down the exhaust. The second plate is not welded it any way. Use a file to file
down the remains of the welds until you can just
pull the restrictor pipe out of the exhaust. It is about 8 inches long. If you
have trouble pulling it out, push it back in and check
that you have filed the remainder of the welds flat. It will come out,
you just have to make sure it does not catch on anything.
12) Once you have pulled the restrictor out, clean up the inside of the
pipe and re-attach it back to the bike reversing the steps
you took to get it off.
The Intake Restrictor
1)
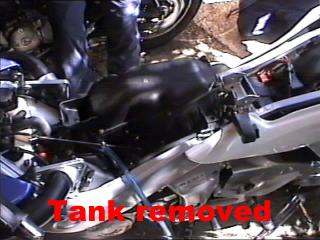
Remove the seat, the undo the tank Allen bolt and lift up the tank, turn the
fuel tap off and un-attach the fuel hose. Undo the
nut and bolt holding the tank to the frame and lift the tank off.
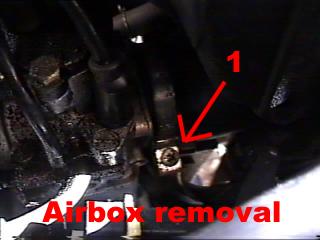
2) Undo the two bolts holding the airbox in place to the frame and use a
screwdriver to undo the cir-clip (figure 1) holding the airbox to the carb. Pull the petrol runoff hose off the airbox and pull the airbox off the
carb. The airbox should now pull out completely.
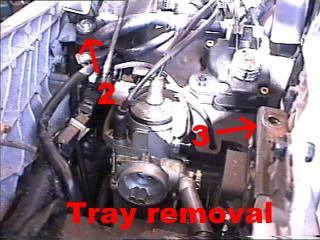 
3) Undo the bolt holding the plastic
tray on which the servo motor
is housed to the frame, do this by taking out the bolt (figure 2) and
uncliping the plastic clip (figure 3) now pivot the tray towards the
headstock giving you room to work on the carb.
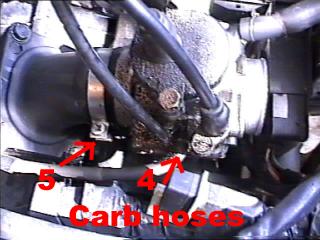
4) Remove the small hose (figure 4) attached to the left side of the carb (facing
the way the bike is facing) and undo the circlip holding the carb onto the
intake rubber (figure 5). There are two hoses coming out of the top of
the carb which lead to nowhere, leave these and the float bowl spill hose on the
bottom attached, now pull the carb away and leave it dangling to one side.
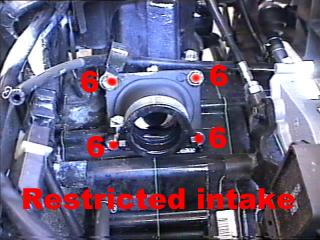
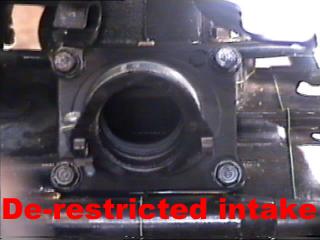 
5) Undo the 4 bolts (figure 6) holding the intake rubber to the engine and take off the
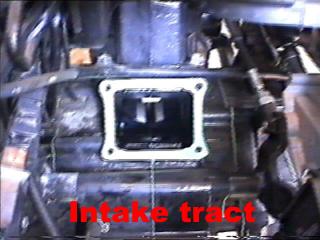
whole lot to reveal the intake tract.
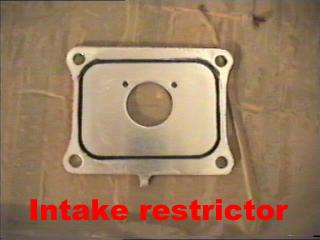
If there is a gold intake restrictor attached to this get rid of it. This is the restrictor plate and you can clearly see that it stops some of the
fuel flow into the crankcase.
7) If your bike did not
have this plate then it was not restricted in the intake, if the plate was there
you should have pulled it off
by now. Now re-assemble everything reversing the steps you followed to take it
apart.
8) Once the bike is back together try starting it. Remember to make sure
you turned the fuel tap back on... It may take a while
for the bike to start running properly, after about 5 minutes it should be back
to normal.
Other Restrictions
Let us dispel a myth - the UK spec bikes
do not have restricted CDI units, only the import (RR) bikes have these. The
only other way in which the NSR is restricted is that the UK spec bikes have 1
tooth missing from the front sprocket, fitting a larger one will see the bike
hitting 110Mph at the expense of some acceleration time. Some bikes which have
been restricted as imports have the movement of the throttle slide restrcited,
so the throttle is never fully open - to check this have a look into the carb
whilst turning the throttle and try to account for all the throttle grip
movement.
|

